First step I would recommend is to remove the original dpad and try also removing as much of the internal plastic fittings inside the NES as you can because you will most likely need all the space you can get. You'll notice that the LEDs are aligned with the dpad which I thought was cool as it cycles up,down,left,right for each beat. I've also arranged the mode button for the arduinoboy to line up with the NES select button :)

Theres nothing special with the select button really, its just a pushbutton under the select button. The dpad however took a bit of trial and error as its easy to underestimate how little space is in there. It consists of 5 Flat top Mini LED's faced outwards with a polarisation filter between the LED's and front controller plate. The Flat top Mini-LED's seemed to be the only type of led I managed to fit with the polarisation filter in place. In the end its up to you how you want to mount it, just be sure the leds are wired to the correct pins on the arduino for the cycling effect. From memory the dpad direction LEDs are mapped to the arduinoboy as follows (please dont hold this against me if im wrong)
Left = D8
Down = D9
Right = D10
Up = D11
Middle = D12
(Unfortunately the status LED has to be sacraficed... oh well)
If you decide to use a polarisation filter to go over the LEDs you may also want to scratch it up a bit to disperse the light more.... again up to you :)

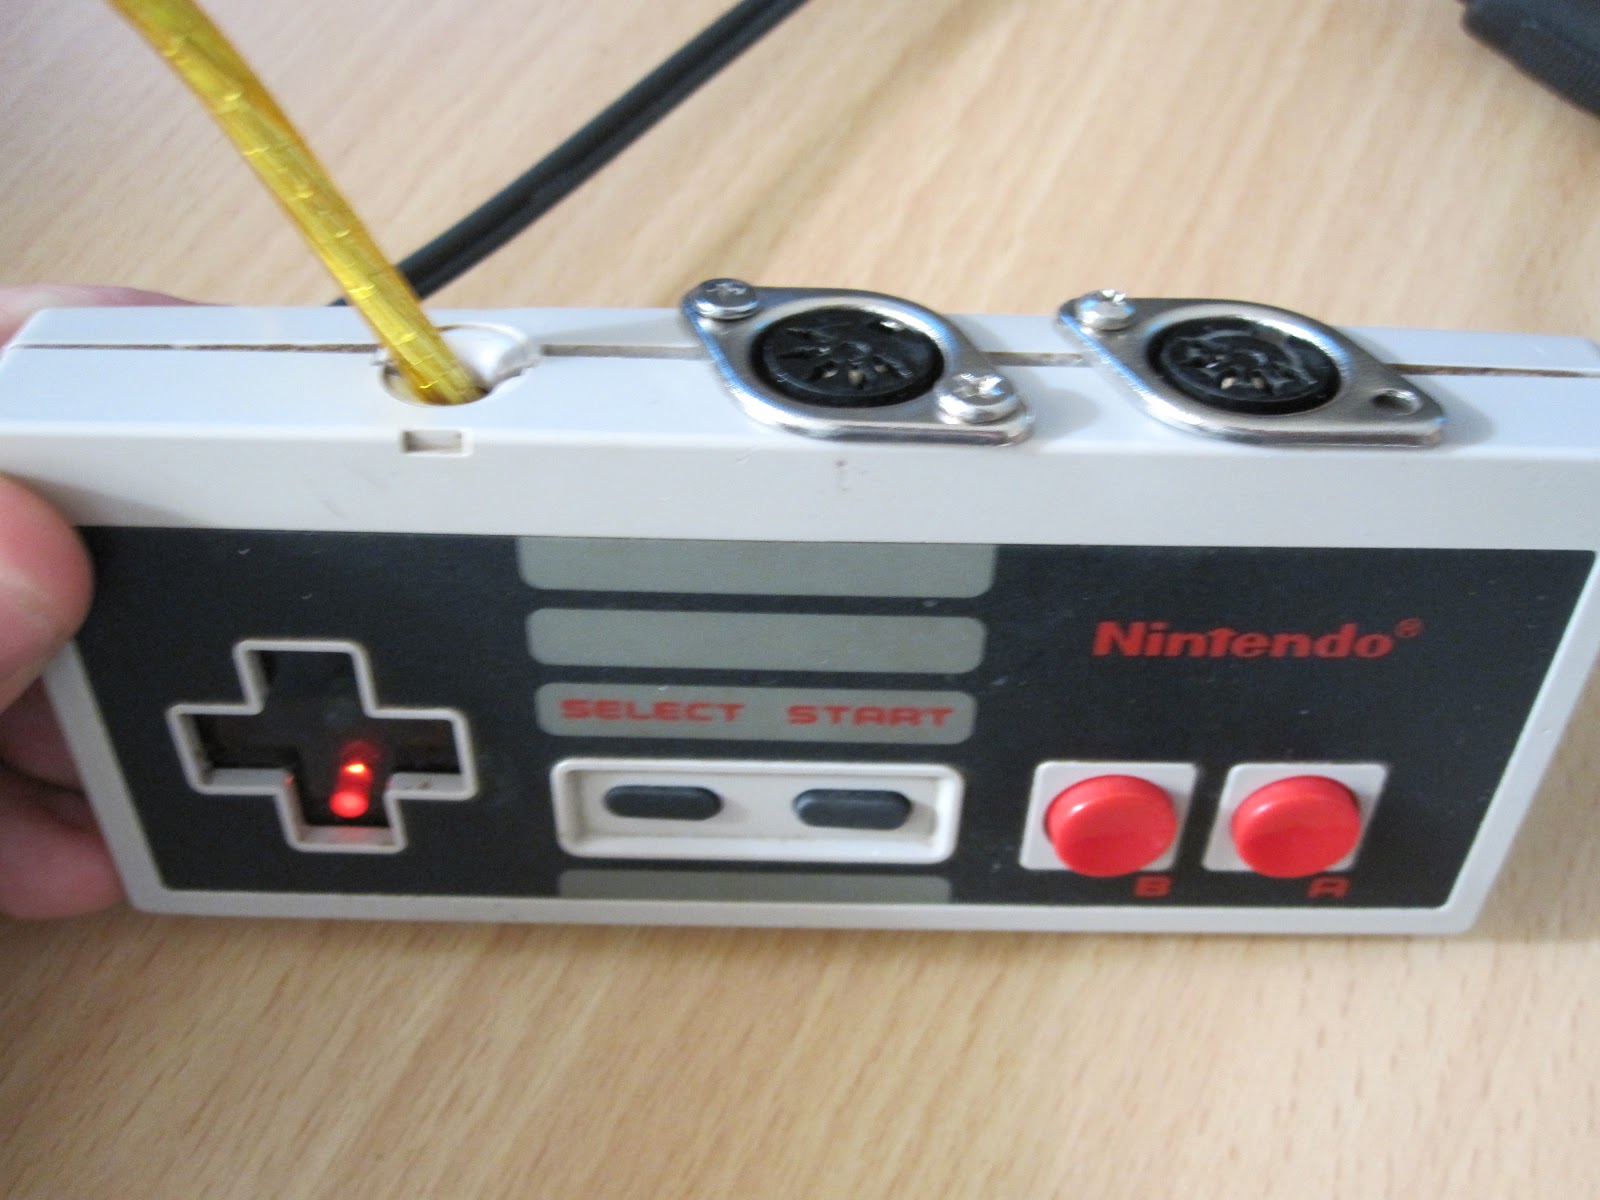
The tightest fit by far has to be the DIN connectors at the top. Kudos if you can fit smaller DINs than what I used but for the type I used the diameter of the hole had to be the entire height of the NES controller and some. If you look carefully at the photo below you'll see a groove made using a dremel to thin out the thickness of the plastic.... it was that close.

No comments:
Post a Comment